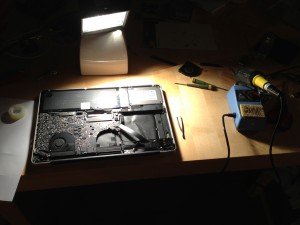
A couple of days ago, my 15″ Macbook Pro from early 2011 started to misbehave. It didn’t wake up from sleep and froze regularily.
 After a lot of headscratching, grepping of logs, cursing of TimeMachine and googling, I finally identified my 256 GB Crucial M4 SSD, firmware rev. 009, as the likely culprit. A new firmware version 070H claimed fix a bug that was triggered after 5184 hours of uptime. Sure enough, the uptime reported by SMART on my 15 month old disk was way above this threshold (note to self: spend less time in front of computer).
So I decided to update the firmware. This is where the fun part begins. Updating the firmware is usually not a big deal: burn an image to a CD or write it to an USB stick and reboot the machine, confirm some scary warnings and presto, you are done. But not so quick.
First, I tried the USB route. The update instructions on Crucials website for Mac OS X were not really helpful, with the link to the USB installer being dead. After further googling, I managed to write the image to the thumbdrive, but it was not detected at boot time.
More googling ensued, which revealed that the disk image provided by Crucial was DOS-based and therefor did not allow booting from USB with EFI-based systems like my Macbook. So I pulled out an ancient stack of empty CD-Rs that was collecting dust in my bookshelf and burned the image to disk.
Now, when I installed my SSD about a year ago, I removed the optical drive and replaced it with the original HDD to have more disk space available. But I had a external USB enclosure for the drive, so every was fine right? Wrong! Apparently, booting the firmware updater from an external USB CD drive didn’t work either.
After even more googling, I found a solution in the Crucial support forum. Just download a rEFIt-based disk image that contains a linux bootloader and replace some files with the firmware update image and you are good to go. Unless you get the message “no boot device”, then you are out of luck.
After about 2 hours, I relented to my fate, pulled out the screwdriver and temporarily put my optical drive back into my Macbook. The firmware update took about 2 minutes. At this point, I should have closed my Macbook and gone on a bike ride, as I initially had planned for the evening.
Instead I thought it would be a good opportunity to do some maintenance and clean out the dust from the heatsinks. If you find yourself in the same situation, my advice is: DON’T. At least, check ifixit.com and make sure you have a good idea how to remove and, more importantly, plug in the fans. Otherwise, you might accidentally tear the fan connector from the mainboard. Oops. If you are exceptionally unlucky, you might even rip off one of the tiny SMD resistors right next to the connector. Double Oops.
I quickly realized that this incident is probably not covered by warranty. My options where either a) buy a new Macbook, b) buy a new mainboard or c) try to solder the parts back to the mainboard – with high probability that I do more harm than good and will have to go back to either a) or b).
So I borrowed a pair of tweezers from my girlfriends cosmetic accessories, polished the magnifying glass that came with the sea monkeys in the Yps Magazine and heated up my crude soldering iron, and got to work.
Apparently, my soldering skill are better than anticipated, as I’m writing this post on my Macbook with both fans happily spinning at 2000 rpm. The system did not crash (so far), so the firmware update might have helped as well.
TL;DR: Crucial M4 firmware updater sucks; don’t mess with the fans on your Macbook
